Lovely Spellbinder dies! They always have something tempting on the market and I am getting use out of my Poinsettia dies.
I made these Poinsettias from simple coloured card and added the accents with Distress Inks in Vintage Photo, Peeled Paint and Mustard Seed. I added Flowersoft in the middle of the flowers which I coloured with Glimmer Mist to darken the pastel yellow shade it originally had.
Card 1: paper: MM Christmas pack, Spellbinders frame die with Antique linen Distress Stain, K&Co ribbon, Stampers Anonymous stamp in gold embossing powder, Viva pearl pen.
I like the worn detail of the stamp and as you can see, I have used 2 shades of Pearl pen Gold and Bronze.
Card 2 has a cut from the beautiful Marianne Design die with 2 Poinsettias from the Spellbinders die. The paper is again MM and the ribbon from K&Co. The background yellow card has been distressed for both cards with Mustard Seed ink.
Friday, 28 October 2011
Monday, 24 October 2011
Christmas with the penguins
I have a larger rectangle Christmas card on show today, made with a stamp from Penny Black Mimi's Christmas. It has these silly penguins in the snow with their snowman.
I used My Minds Eye papers and decorated the edge with dripping Crackle Paint in Picket Fence.
The sentiment stamp is from Tim Holz which I stamped in Walnut Stain and added Stickles over the top.
The snowflakes are cut with the Cricut and from the batch I made weeks ago. I love the puffy stuff over the top of them that makes them squishy, I just added some bling in the centres.
I coloured my main image with Copics, but found it quite difficult to be neat and get the blacks to work for the penguins. Next time I might go for my pencils again.
Friday, 21 October 2011
25th of December with Magnolia
It has been a while since my last post due to a busy schedule at work, but I am back with a vengeance and I have 2 similar cards to share.
I have 2 cards with Tilda stamps from Magnolia.
For both card I used Webster's Pages Botanical Christmas papers.
I coloured my stamps with Caran d'Ache pencils and added Stickles in their hair.
The poinsettias are die-cut with Spellbinders in felt with gold Stickles in the centre.
The border and corner dies are from Joy! Crafts an which I used white gel pen and Distress Crackle paint in Picket Fence.
The little date stamp is from Lili of the Valley.
The die cut poinsettia in Cranberry felt.
I loved using the kraft card stock and wish I could find it in a big pack rather than cutting up small cards.
Hope you like my cards and thanks for visiting.
Thursday, 6 October 2011
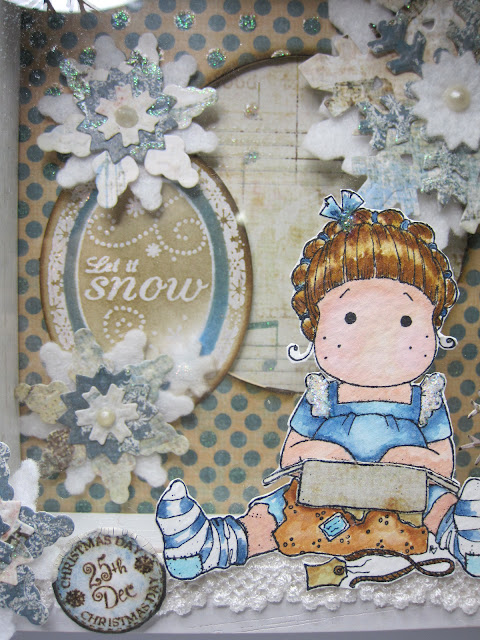
Christmas decoration with Magnolia (2)
A shadow box with Magnolia for Christmas home décor.
I had this frame lying around for a couple of years and sometimes I would change the picture in it, but now it had been waiting for me with a project inside and never completed. So as I am into making Christmas decorations, this little frame is going to be part of it.
I used 2 Magnolia stamps ans 2 stamps from Lily of the Valley and 1 stamp from Just-Rite, all stamped in Distress inks and coloured with them.
How I started my initial idea; My Mind's Eye papers for the backdrop and the snowflakes. the snowflake are made with Spellbinders dies and I also cut them out of felt.
The shadow box, finally finished with all the details added. Little flowers from Kaisercraft sprayed with Glimmer Mist and some McGill punched branches. The girls are all ready for the party, dressed in blue.
I just had to add some Stickles for sparkle on their clothing.
I did a little paper-piecing on the gift box and used the same paper as in the background circle.
The snowflakes have got a little pearl as centre made with Viva pens. The oval stamp has been embossed with holographic powder and then distressed to make the sentiment stand out.
Almost everything has been distressed and I have put Picket Fence Crackle Paint on some edges for a snow-look
I had fun making this, I hope you like it too and had fun visiting.
Tuesday, 4 October 2011
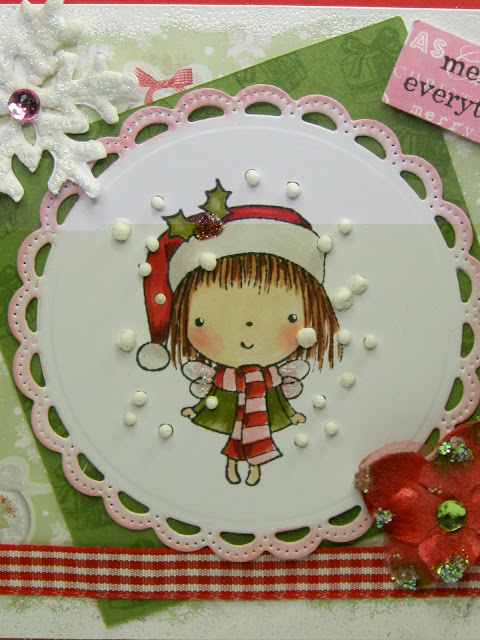
Snow days with Mimi (2)
Enjoy another Christmas card with Mimi.
Sure you'll be seeing more Christmas stuff on my blog. I have been stamping a few more Christmas images.
Papermania papers for the background with white embossing powder on the edges to resemble snow.
Stamping with Versamark to create the green background paper, fluffy stuff from Woodware to create the snowflakes.
Petaloo flowers with extra thick Lime Ice Stickles.
My own home-made puffy snowflakes with Doodlebug gem.
The sentiment is from the same stampset by Penny Black.
Christmas decoration with Magnolia (1)
Hello to you all out there,
Interested in the world of papercrafters, cardmakers and scrapbookers? You are more than welcome on this visit.
I have turned a new page in my crafting life. No, I 'm not stopping with cardmaking, but I have come into another kind of mojo, where I want to make home décor and turn my stamped images into something for the home. It might be, because Christmas is the next festivity up and that always brings a good reason to decorate. These days I am just looking for things to recycle, re-use and alter.
I am itching to show you my next project; Santa's little helper from Magnolia. It's an altered candle tin.
The completed altered tin. I bought my Magnolia stamps at Crafts U Love. The image is stamped on 300gms watercolour paper so I could use Tim Holz Distress inks (tattered rose, spun sugar, victorian velvet, peeled paint, pine needles, barn door, pumice stone, brushed corduroy and vintage photo)
The star and the tree are cuts from the Cricut. The tree is cut 3 times and scored in the middle and glued together.
I put Tilda on an acrylic tab so she appears to be sitting on the edge of the tin. I stacked some pompoms behind Tilda, so you better be carefull, because she might snowball you :)
The roses are from John Lewis. Yes, I do get my craft stuff everywhere... Look at the "all natural wonky" tree. Fine piece of art :) The edges are painted with picket fence crackle paint from Ranger to look like snow.
The paper is from a collection by Papermania and the border is made with a Martha Stewart punch. At the end I sprayed the whole piece with Glimmer Mist Dazzling Diamonds. Sparkle!
Goodbye from cheeky Tilda!
Subscribe to:
Comments (Atom)


